 By Graham Fisher
Updated November 2026
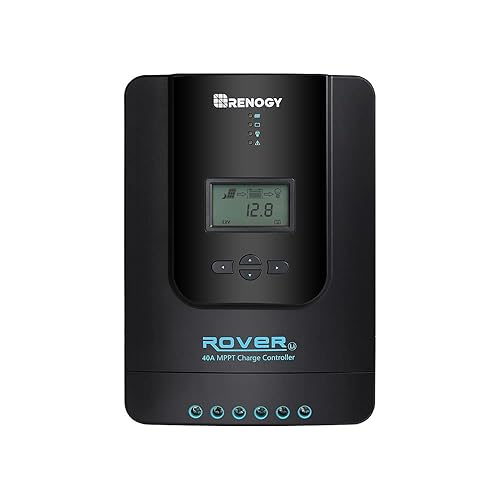
Solar charge controller repair is often simpler than it looks, but only if you work methodically. In this guide you will learn how to confirm the controller is actually at fault, check the usual failure points, make safe repairs, and know when a replacement is the better call. Always disconnect power before you open or touch the unit.
Confirm the Controller Is the Problem
Many “dead controller” complaints turn out to be a panel, battery or wiring issue. Before you open anything, check the display or indicator lights and measure voltages at the controller terminals. A healthy controller should show battery voltage on its battery terminals and panel voltage on its array terminals when the sun is up. If the panel side reads zero in good light, trace the wiring back toward the array before blaming the controller.
Shopping for one? See our guide: 6 Best LiFePO4 Battery Solar Charge Controllers Compared for DIY Systems.
Check Fuses, Breakers and Wiring First
Most repairable faults are external. Work through this sequence:
- Confirm the battery breaker or fuse is closed and the battery voltage is within the controller’s operating range.
- Inspect the in-line fuse on the battery side. Replace it only with one of the same amperage and voltage rating.
- Look for scorched insulation, green corrosion or loose screw terminals. Re-torque connections to the torque value in the manufacturer’s manual.
- Measure open-circuit voltage at the array input with a multimeter. Compare it to the panel nameplate, adjusted for temperature.
Test the Internal Components
If external checks pass, the fault is likely in the power stage or the control board. Common failure points include blown MOSFETs, damaged input protection components, and cracked or bulging capacitors. A visible burn mark or a board with a sharply charred smell usually means a deeper repair. Use a multimeter in diode mode across the terminals to look for shorts, and compare readings against a known-good unit of the same model if you have one.
Replacing surface-mount parts requires a temperature-controlled soldering station, a hot air station and steady hands. If the board is cracked, or several components look damaged, a repair shop or the manufacturer’s service center is the safer route.
Watch for Heat Damage
Controllers that run hot for long periods often fail at the same spot repeatedly. Check that the heatsink is clean, fins are not blocked, and the unit has airflow. Poor mounting or an undersized enclosure can cause repeat failures even after a successful repair.
Repair Steps That Are Worth Doing
Good candidates for DIY repair include replacing a blown fuse, tightening or replacing corroded terminals, swapping a failed cooling fan, and replacing a cracked display or indicator. Keep a log of what you changed, including part numbers and measured values before and after. That record helps if the problem returns.
Common Mistakes
- Replacing a fuse with one of higher amperage to stop it blowing, which hides a real short.
- Working on a controller while it is still connected to a live array, which can cause arcing.
- Assuming a controller is dead when the battery is simply below the low-voltage cutoff.
- Ignoring the battery chemistry setting, which can make a working controller look faulty.
- Repairing a unit without checking that the replacement part matches the original voltage and current ratings.
Recommended gear
- Fluke 117 multimeter: a true-RMS meter that handles DC voltage and continuity checks needed for controller diagnosis. View on Amazon
- Hakko FX-888D soldering station: adjustable temperature control helps protect small board components during rework. View on Amazon
- Klein Tools insulated screwdriver set: rated tools reduce the risk of shorting terminals while you work near live conductors. View on Amazon
FAQ
Can I repair a solar charge controller myself?
Yes, for fuse replacement, terminal cleaning and wiring checks. Board-level repairs need soldering skill and proper tools, so be realistic about your experience.
How do I know if the controller or the panel has failed?
Measure open-circuit voltage at the panel leads and at the controller input. If the panel reads correct voltage but the controller input does not, the problem is in the wiring or the controller.
When should I replace instead of repair?
Replace the unit if the board shows heavy burn damage, multiple failed components, or if repair parts cost more than a new controller. For safety-critical or warranty-covered units, contact the manufacturer or a qualified electrician first.
Conclusion
Solar charge controller repair starts with ruling out the wiring, fuses and battery before you open the case. Simple external fixes solve many problems, while internal faults call for careful testing and proper tools. When a repair is uncertain or the damage looks serious, consult a qualified professional.
Related reading
- Solar Charge Controller Lithium Ion: How to Choose and Wire One (Step-by-Step)
- Solar Charge Controller DIY: Wire and Size One in 7 Steps
- Solar Charge Controller 100 Amp: How to Size and Wire One Safely
Ready to choose one?
About Graham Fisher
Graham Fisher is part of our editorial team and reviews and edits our DIY solar power systems guides, checking product details against manufacturer specifications and owner feedback.