 By Graham Fisher
Updated November 2026
A renogy pwm solar charge controller sits between your solar panels and your battery bank and regulates the charging current so the battery is filled correctly and not overcharged. In this guide you will learn how to confirm a PWM controller fits your system, size it against your panel array, and wire it in the correct order. The math is simple once you know the three numbers that matter: system voltage, panel short-circuit current, and load.
Confirm PWM Is the Right Type for Your Array
PWM (pulse width modulation) controllers connect the panel array almost directly to the battery, so the panel voltage must be close to the battery voltage. In practice, that means your array should be wired to match your battery bank, usually 12 V or 24 V nominal. If your panels produce a much higher open-circuit voltage than the battery, an MPPT controller is the better choice; see MPPT vs PWM Charge Controllers: How to Match One to Your System for a side-by-side comparison.
Shopping for one? See our guide: 6 Best LiFePO4 Battery Solar Charge Controllers Compared for DIY Systems.
Size the Controller Against Your Panels
Start by reading the short-circuit current (Isc) on each panel’s label. Multiply Isc by the number of panels wired in parallel, then add a 25 percent margin for cold, bright conditions. For example, four 100-watt panels at about 6 A Isc each, wired in parallel, give 24 A; multiplied by 1.25 that is 30 A, so a 30 A controller is the minimum. Round up to the next available rating. Renogy PWM models are offered in several current ratings, so check the manufacturer’s datasheet for the exact maximum input for your model before buying.
Check Battery Voltage and Load Current
Set the controller to the same nominal voltage as your battery bank. Then add up your DC loads in amps. The controller’s load output must handle the total continuous draw, and it should carry no more than the rated maximum. If you are building a larger bank, the guidance in Solar Charge Controller 100 Amp: How to Size and Wire One Safely covers higher-current wiring practices that apply here too.
Wire the Controller in the Correct Order
Wiring order matters because connecting panels to a controller with no battery present can damage electronics. Follow these steps:
- Mount the controller in a dry, ventilated spot close to the battery, with short cable runs.
- Connect the battery to the controller first, observing polarity (red positive, black negative).
- Connect the solar panel array to the controller’s PV input.
- Connect loads to the load terminals, if your system uses them.
- Install a fuse or breaker within 7 inches of the battery positive terminal, sized above the controller’s rated current.
- Power up and confirm the display shows battery voltage and charging status.
Disconnect in reverse order. For complete system layouts, the steps in Wiring Diagram for Off-Grid Solar System: A Step-by-Step Guide show how the controller fits alongside inverters and combiner boxes.
Common Mistakes
- Connecting panels before the battery, which can cause voltage spikes.
- Using wire too thin for the current; undersized cable overheats and drops voltage.
- Choosing a controller rated just equal to Isc with no margin for cold weather.
- Mixing a 12 V panel string with a 24 V battery without checking the controller’s voltage setting.
- Skipping the fuse on the battery side.
Recommended Gear
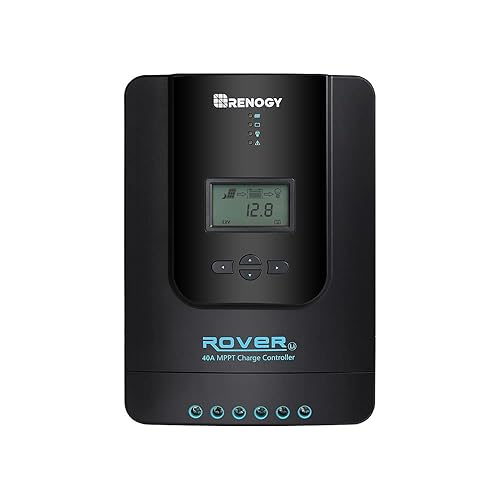
- Renogy Rover PWM controller: a widely sold PWM model that supports common 12 V and 24 V battery setups, a good match for small DIY arrays. View on Amazon
- Inline battery fuse holder: a simple, required safety part for the battery-side connection. View on Amazon
- Tinned copper MC4-rated PV cable: correctly sized cable reduces voltage drop from panels to controller. View on Amazon
FAQ
Can a PWM controller charge a lithium battery?
Many PWM controllers can, but only if the charging profile matches the lithium chemistry. Confirm the controller offers a lithium or LiFePO4 setting and that the voltage limits match your battery manufacturer’s specifications.
Why does my controller show a lower charge than my panels should produce?
PWM controllers pull the panel voltage down to battery voltage, so output current is limited by battery state and wiring losses. Check for voltage drop in your cables and confirm the battery is not already near full.
Do I need a fuse between the panels and the controller?
Check the manufacturer’s manual. Many installations add a fuse or breaker on the panel side as well as the battery side, especially when several strings are combined.
Conclusion
A renogy pwm solar charge controller is a reliable, straightforward choice when your panel voltage matches your battery bank. Size it with a 25 percent margin over the total panel short-circuit current, wire it in the correct order, and protect the battery side with a fuse. For wiring around high-current or high-voltage systems, consult a licensed electrician to review your design.
Related reading
- Solar Charge Controller Repair: A Step-by-Step Guide for DIY Builders
- Solar Charge Controller Lithium Ion: How to Choose and Wire One (Step-by-Step)
- Solar Charge Controller DIY: Wire and Size One in 7 Steps
Ready to choose one?
About Graham Fisher
Graham Fisher is part of our editorial team and reviews and edits our DIY solar power systems guides, checking product details against manufacturer specifications and owner feedback.