 By Claire Whitaker
Updated November 2026
Solar panel kit installation is a manageable project for a handy homeowner, provided you plan the layout, mount the panels securely and wire everything in the correct order. This guide walks through the process from site assessment to first power-up, so you finish with a working array that matches your kit’s specifications and passes a basic safety check.
Plan the Site and Confirm Your Kit Matches It
Start by measuring the roof or ground area you plan to use. Panels should face south in the Northern Hemisphere and north in the Southern Hemisphere, and they should have no shade from roughly 9 a.m. to 3 p.m. Mark the panel footprint on the surface, then confirm the total wattage and panel count fit within your mounting space. Check your kit’s manual for maximum series voltage and the charge controller’s input limits so that your string voltage stays within range, especially in cold weather when open-circuit voltage rises.
Mount the Panels and Racking
Install the racking first, following the manufacturer’s torque values for every bolt. On a roof, locate rafters with a stud finder, drill pilot holes, and seal each penetration with flashing and sealant. On a ground mount, set footings below the frost line in your area and check that the rails are level and square. Attach the panels to the rails with the clamps supplied, leaving the spacing the instructions call for so that thermal expansion does not stress the frames. Do not walk on panels, and do not tighten clamps so hard that the glass or frame cracks.
Wire the Panels in Series or Parallel
Most kits use MC4 connectors, which snap together only when polarity is correct. Connect panels in series to raise voltage, or in parallel to raise current, depending on which suits your charge controller. Keep positive and negative runs separate, and cover any unused connectors with the caps supplied. Route cable along the racking with UV-rated clips so it is not pinched or exposed to sunlight.
Connect the Controller, Battery and Inverter
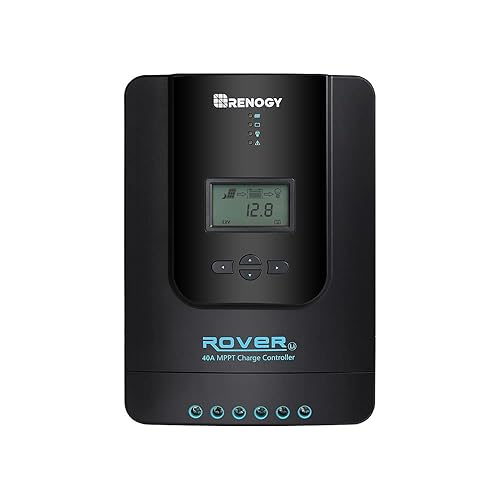
Mount the charge controller in a dry, ventilated spot close to the battery bank. Connect the array to the controller first, then the battery, and only then the load or inverter. Reversing this order can damage the controller. Use fuses or breakers on both the battery and array lines, sized to the conductor ampacity. Ground the metal racking and the inverter chassis to your system ground, following local electrical code.
| Step | What to check |
|---|---|
| Array voltage | Open-circuit voltage stays under the controller’s maximum input |
| Polarity | Multimeter confirms positive and negative before connecting |
| Fusing | Fuses or breakers sized for each conductor run |
| Grounding | Racking and chassis bonded to system ground |
Test and Commission the System
With everything connected, use a multimeter to verify array voltage at the controller input before the battery is connected. Then connect the battery and confirm the controller shows the correct system voltage. Watch the charging display on a sunny day and check that the battery reaches its absorption stage. Inspect all connections after the first week, since loose terminals often show up as heat or intermittent faults.
Common Mistakes
- Exceeding the controller’s maximum input voltage by wiring too many panels in series.
- Skipping fuses or using undersized wire for the run length.
- Mounting panels where a chimney, tree or vent shades them during peak hours.
- Forgetting to seal roof penetrations, leading to leaks.
- Mixing panels of different wattages or ages in the same string.
Recommended Gear
- Digital multimeter: Lets you verify polarity and voltage before any connection is made. View on Amazon
- MC4 crimping tool: Produces secure, weatherproof connections on field-terminated cable. View on Amazon
- Stud finder: Helps you locate rafters before drilling roof mounts. View on Amazon
For a broader look at kit options before you start, see Top 7 DIY Solar Panel Installation Kit Options Compared for Beginners. If you are planning a roof-mounted array, Top 3 Solar Panel Mounting Kit Options Compared for Roofs and RVs covers racking choices. Those wiring a larger system may find Solar Panel Home Kits Diy: How to Choose and Wire a Kit (Step-by-Step) helpful.
FAQ
Can I install a solar panel kit myself?
Many homeowners complete ground-mount and small roof installations themselves, provided they follow the manual and local code. Roof work carries fall risk, so consider help for steep or high roofs.
Do I need a permit for a DIY solar installation?
Requirements vary by city and utility, and many areas require permits and inspections for grid-tied systems. Contact your local building department before starting, and consult a licensed electrician for work on your main panel.
How do I know if my wiring is correct?
Use a multimeter to confirm polarity and open-circuit voltage before connecting the controller. If anything reads unexpectedly, stop and recheck the connections.
Conclusion
A careful solar panel kit installation rests on three things: matching the array to your site, mounting the racking securely, and connecting components in the correct order. Verify voltage and polarity at every stage, and recheck connections after the first week of operation. When in doubt about electrical work, consult a licensed professional.
Related reading
- Top 3 Solar Panel Kit 1000 Watt Options Compared for Home and Off-Grid Use
- Top 3 Kit Panel Solar 1000W Options Compared for Home and Off-Grid Use
- Solar Thermal Panel Kit: How to Choose and Install One in 6 Steps
Ready to choose one?
About Claire Whitaker
Claire Whitaker is part of our editorial team and reviews and edits our DIY solar power systems guides, checking product details against manufacturer specifications and owner feedback.